How to Name Content in Excel
The information below shows how to name/link content in Excel, so the content can be Submitted to Word and/or PowerPoint
Initially, your Word or PowerPoint document needs to be LINKed to your Excel workbook once, then you can UPDATE the document many times or by many people.
- In Excel, name source items (cells, ranges, tables, shapes, and charts)
- Then link (associate) those source content items to destination (Word or PowerPoint) content items using the add-in.
In the add-ins, instructions can be found:
- In Excel: on the List tab, under “How to Name Content”
- In Word: on the Link tab, under "Details"
- In PowerPoint: on the Link tab
Excel-to-Word Linking Tutorial
Learn how to link a variety of content, including text, tables, charts, images and shapes, from Excel workbooks to Word documents
How to Create Text Links in Excel
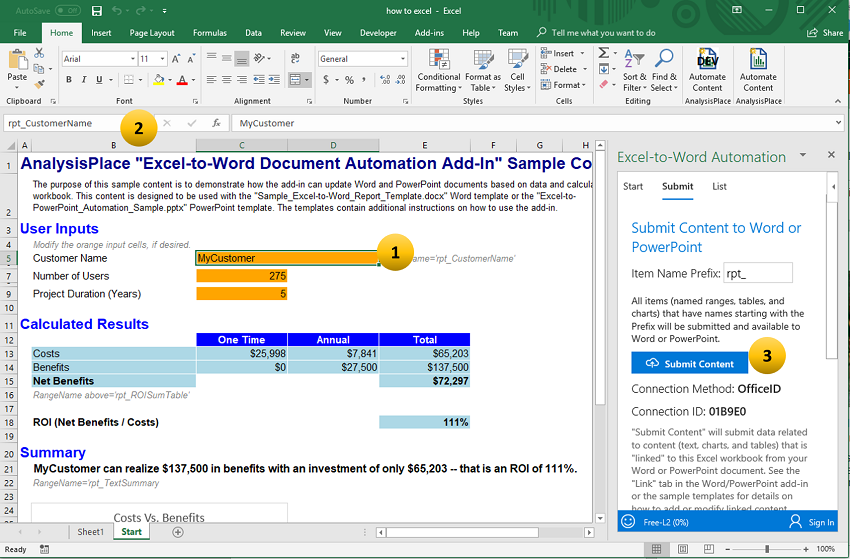
1. Select the cell with text that you wish to link.
2. In the Name Box enter the "item name prefix_name". For example rpt_MyCustomer (then hit enter)
3. Click on Submit Content when you are done with linking all of your content.
How to Create Table Links in Excel
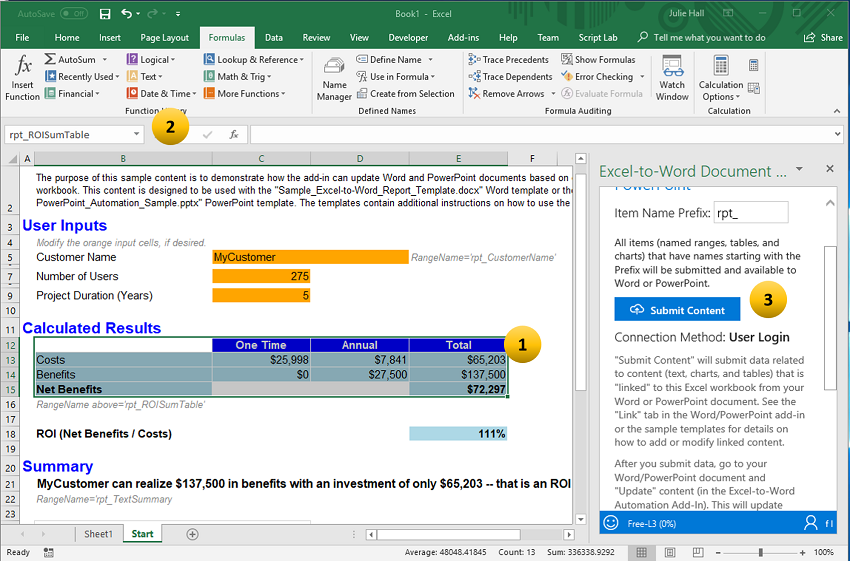
1. Select the range that you would like to link.
2. In the name box enter the "item name prefix_name" For example rpt_ROISumTable (then hit enter.)
3. Click on Submit Content when you are done with linking all of your content.
Alternate method
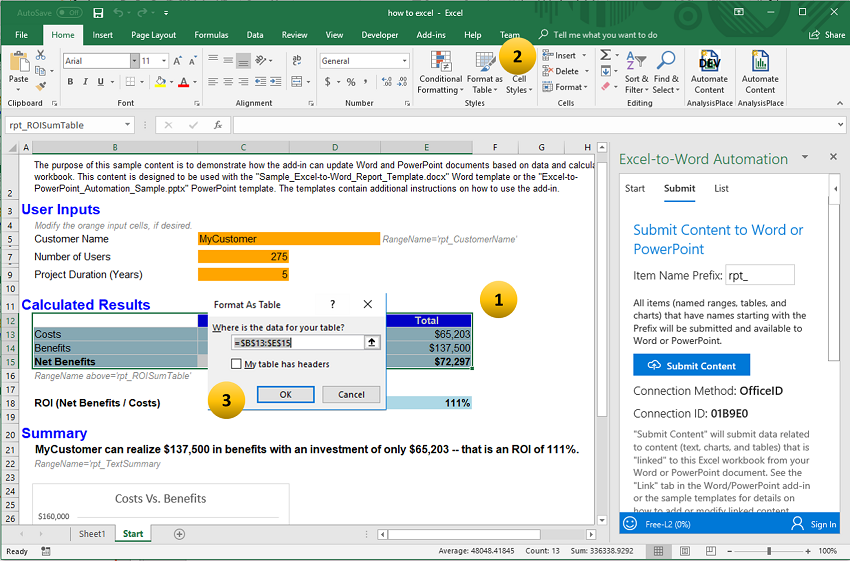
1. Select the range that you would like to link
2. Under the home tab in Excel choose Format as Table
3. Choose OK on the Format as Table pop up that appears
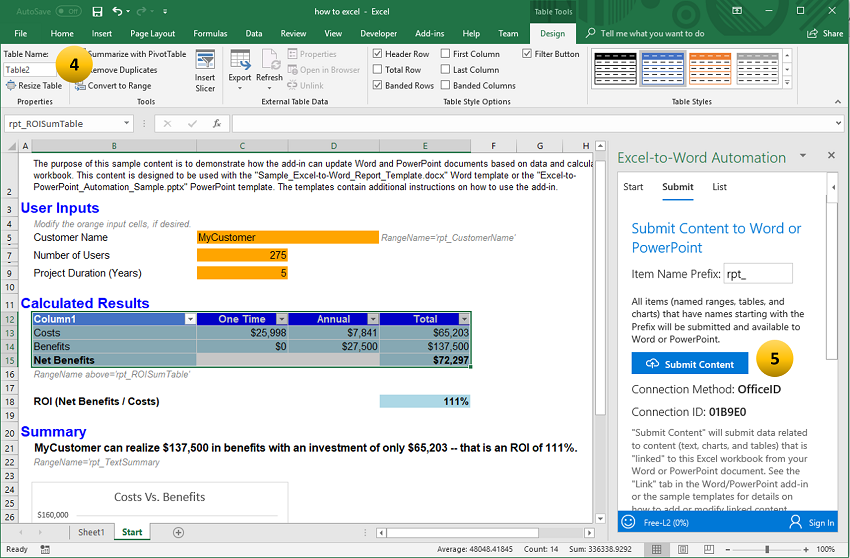
4. In the Table Name box enter "item name prefix_name" For example rpt_ROISumTable (then hit enter.)
5. Click on Submit Content when you are done with linking all of your content.
How to Create Chart Links in Excel
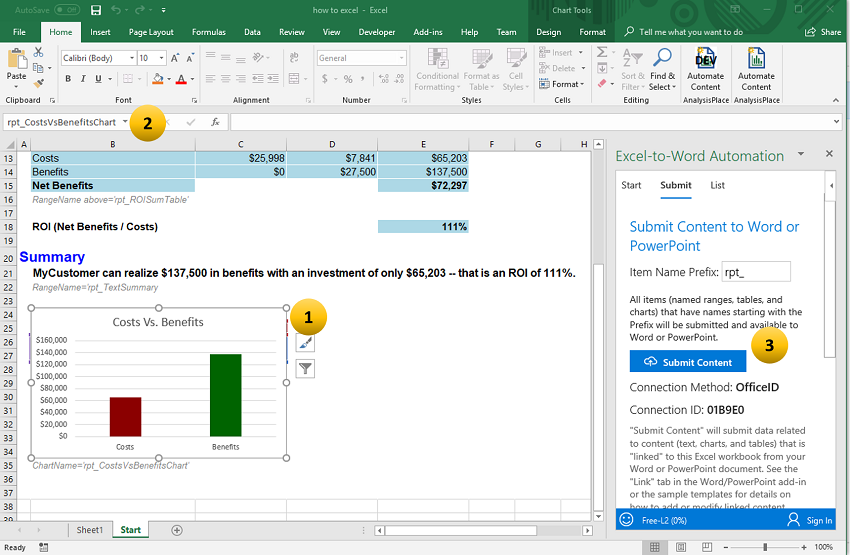
1. Select the chart that you wish to link.
2. In the Name Box enter the "item name prefix_name". For example rpt_CostsVsBenefitsChart (then hit enter)
3. Click on Submit Content when you are done with linking all of your content.
How to Verify Your Links
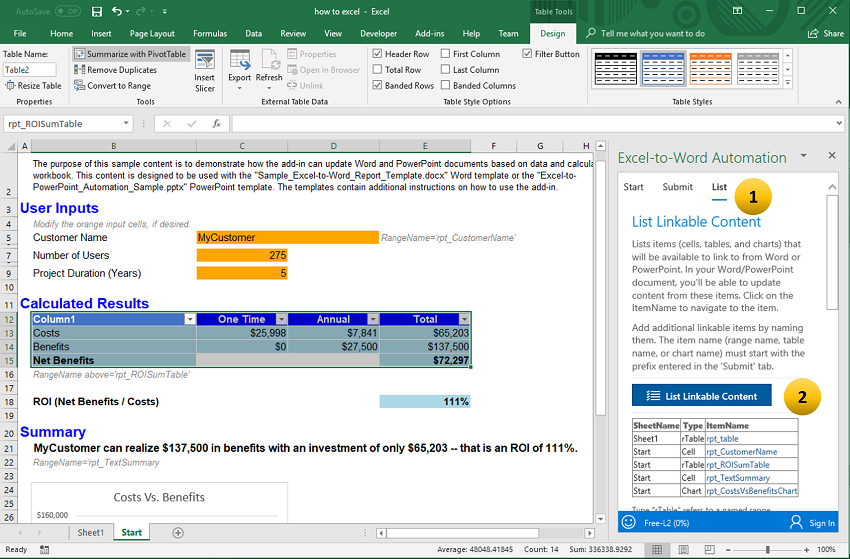
Before submitting your links it is a good idea to check that all of your links have been created.
1. Go to the List tab of the add-in
2. Click on "List Linkable Content" to find the complete list